


While developing mobile apps that require internet connectivity, it's significant to handle poor network conditions. Because mobile app users will likely to have a much slower network than we use while developing.
As a developer, you didn’t want to throw away your invaluable time looking for a location with a poor network to test the app. So there are some ways to simulate poor network conditions during development.
Simulate Poor Network on iOS Simulator
Apple’s official tool to simulate network connections on macOS for testing purposes is the Network Link Conditioner.
1) Steps to install Network Link Conditioner
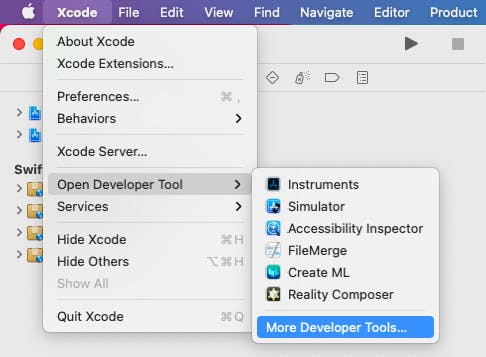
- Open Xcode and go to
Xcode›Open Developer Tool›More Developer Tools...menu (or navigate to https://developer.apple.com/download/more/ )
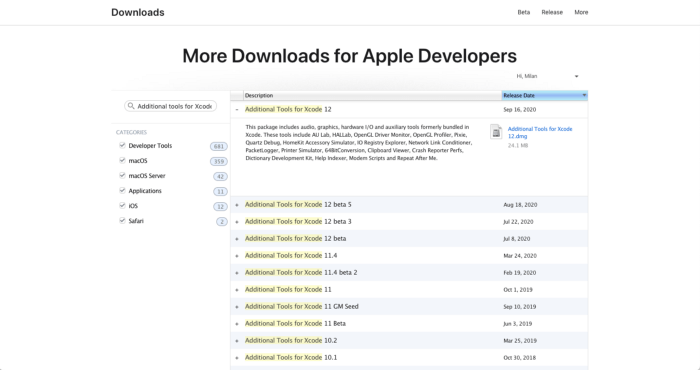
Search for “Additional Tools for Xcode” package [Note: You may need to sign in first]
Download the appropriate release package as per your Xcode version.
Once the download has finished, open the DMG file and navigate to the Hardware directory.
Install the “Network Link Conditioner.prefPane” in your System Preferences by double-clicking on the icon.
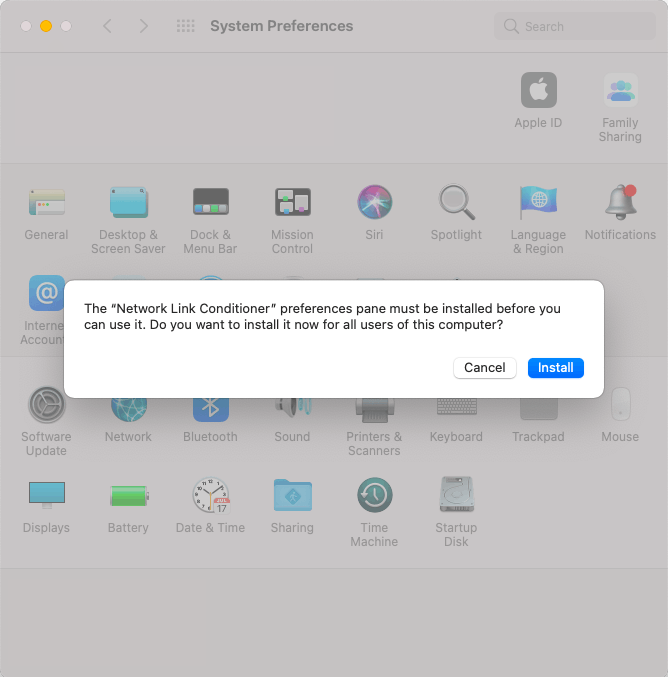
- Once you install, a new item has been added to your System Preferences which will allow you to throttle your network connection speed.
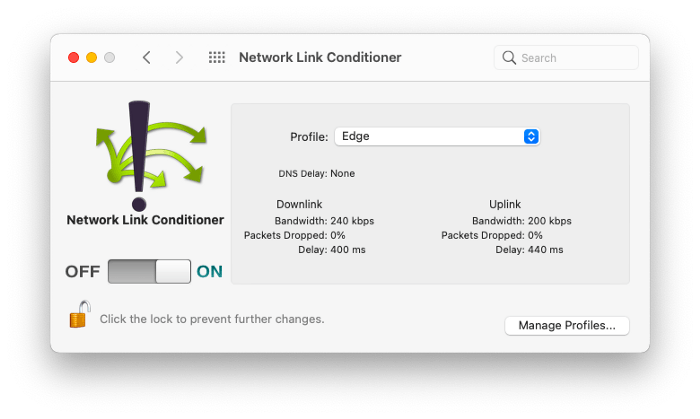
2) Simulate network using Network Link Conditioner
- To simulate the network, turn on the “Network Link Conditioner” and select the preset profile (100% Loss, Edge, DSL, 3G, LTE, etc.) of your choice.
- You can also add a new custom Profile of your choice through Manage Profiles…
CAVEAT:
This will impact your computer internet connection in addition to your iPhone simulator. So, when you’re done testing, be sure to turn this off.
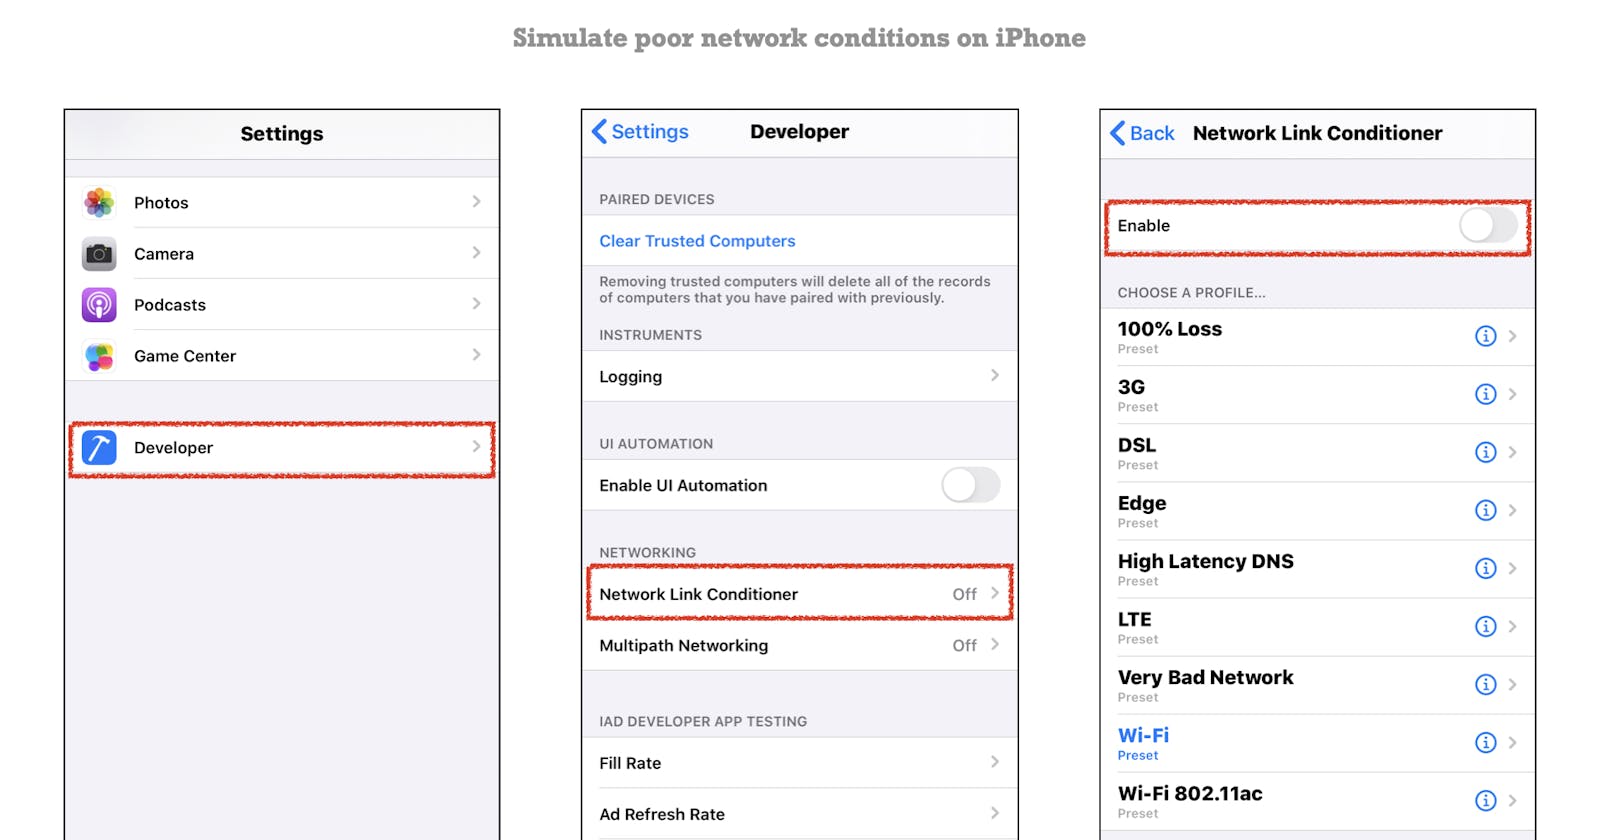
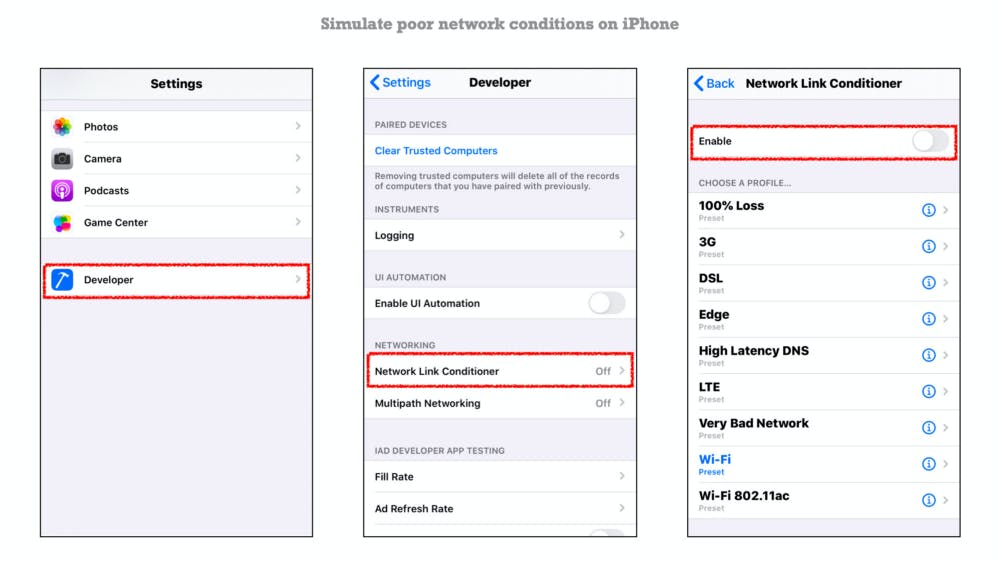
Simulate Poor Network on iPhone
From iOS 6 onwards, the network link conditioner for testing on the device is already built-in. So It’s really easy to simulate a bad internet connection on your iPhone.
- Open the
Settingsapp and navigate to theDeveloperoption. - Select the
Network Link ConditionerunderNETWORKINGoption. - Now enable the Network Link Conditioner & choose the network profile you want, and start testing how your app works in different conditions.
To enable Developer menu on your iPhone/iPad:
- Connect your device to Xcode.
- Your device will ask you to trust your computer. Click on Yes.
- You can now access the Developer settings on your device from the Settings menu.
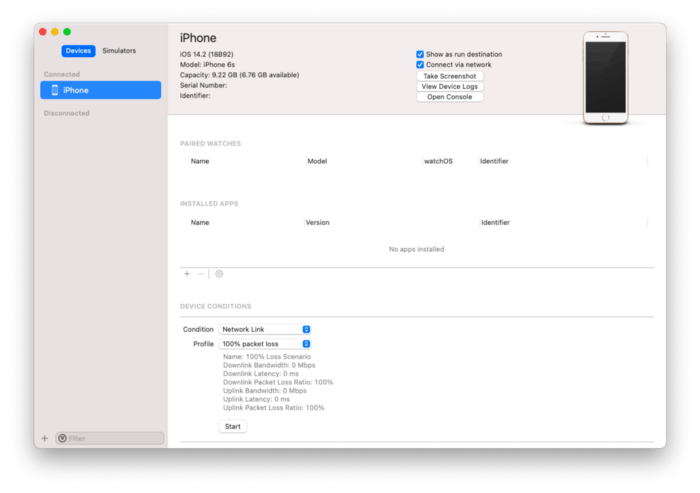
Simulate Poor Network on iPhone Using Xcode
From the Xcode 11 onwards, you can now simulate a network condition right from the Xcode.
- Open Xcode and navigate to
Window›Devices and Simulators(⇧⌘2) - In the left side click on the
Devicesand select the device. - On the right side you should see the
DEVICE CONDITIONSmenu where you can simulate a network condition. - From the Condition dropdown choose
Network Linkoption and choose the network profile of your choice for testing. - Hit the Start button.
Now you can see the gray developer icon on your device statusbar indicating that the network link conditioner is running.
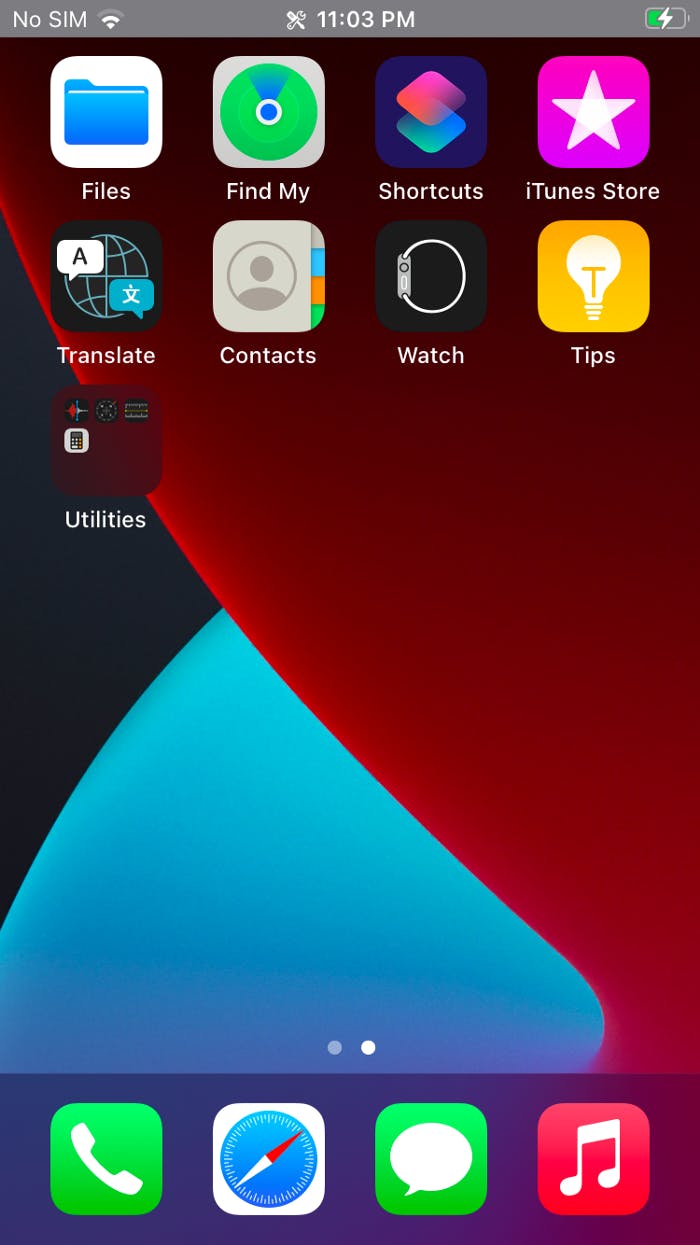
CAVEAT:
- Don’t forget to hit stop button when you are done with your testing. Once network link conditioner stops, the grey icon will no loner visible on your statusbar. You can also stop the network link conditioner by clicking on the grey icon on the status bar.
Questions?
Please feel free to comment below, if you have any questions.
If you like this article, feel free to share it with your friends and leave me a comment. Also, click on the 👏 clap button below to show how much you like the article.
Thanks for reading! 👨🏼💻
You can find me on:
Twitter | LinkedIn | GitHub | Medium | HackerRank | LeetCode | Stack Overflow